Our Blog
How To Reupholster Your Padded Dining Room Chairs
December 7, 2016 02:45:19pm
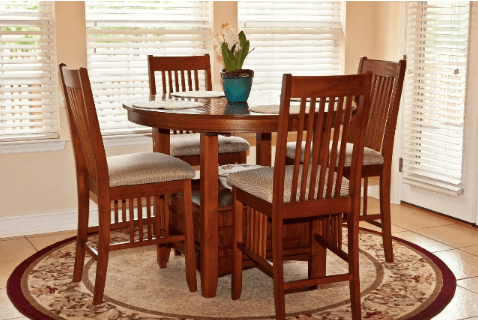
Are your padded dining room chairs looking a little worse for the wear these days? Dated and faded fabrics can give your entire dining room a rundown appearance, and torn padding or flattened cushions are uncomfortable for you and your family and dinner guests to sit on. Give your dining room chairs a new life with our pro tips!
Before you begin your project, you need to assemble your supplies. You’ll need:
- Fabric scissors
- Tape measure
- Screwdriver
- Staple puller
- Upholstery fabric (approximately ½ yard of both fabric and batting per seat cushion, depending on their size)
- Upholstery staple gun and staples
- Spray adhesive
- Jigsaw, if needed
- Plywood (½ inch thick), if needed
- High density foam (at least 1 inch thick)
- Turn the chair upside down and unscrew the seat pad from the chair frame.
- Place the seat pad face down and remove the staples. There may be a layer of cardboard or brown paper (sometimes called a “dust cover”) stapled to the pad, used to cover the raw edges of the fabric. If this material is in good shape, you can reuse it at the end of the project; if not, trace the shape onto new cardboard (or similar material), cut a new piece, and then discard the old piece.
- Remove the old fabric and the padding from the seat pad. Use the old fabric as a pattern to cut the new piece of fabric to the appropriate size for your chair.
- If the plywood insert is in good shape, you can reuse it. If not, create a new insert by either tracing the old base, or by measuring the seat frame and marking the plywood accordingly (subtracting about ⅛ inch all around).
- Trace the shape of the plywood insert onto the high density foam and cut the seat cushion from the foam.
- Use a spray adhesive to secure the foam to the plywood.
- Cover the foam with your batting. Staple one side of the batting into the center of the seat, and then work your way around each side of the seat, pulling the batting taut and stapling.
- Measure the fabric to the seat base’s dimension’s, plus ¼ inch all around, and cut. Note that if you are using a pattern, you’ll want to make sure the pattern is centered appropriately on the face of the seat.
- Lay the fabric face down on a sturdy surface, and place the pad (including plywood, foam, and batting) onto the fabric so that the underside of the seat pad is facing up.
- Attach the fabric in the same way you attached the batting – by stapling on end of the fabric into the seat base, and then working your way around each side, pulling the fabric tight.
- Staple the dust cover (whether you are reusing the old one or have created a new one in Step 2) to the underside of the finished seat pad in order to hide and protect the raw edges of the fabric.
- Screw the seat pad back onto the chair frame.
With the right planning, you can knock out your dining room furniture DIY project on a Saturday and sit down to a nice dinner on your new chairs on Sunday! Home improvement projects such as this are fun for many homeowners. However, problems can arise during the course of a reupholstery project, and you might decide that furniture upholstery is a job for the professionals.
If you live in Northeast Florida, you’re in luck – Jax Furniture Refinishing & Upholstering is the best furniture refinishing shop Jacksonville FL homeowners trust with their furniture. We pride ourselves in the quality of our work, our eye for detail, and our passion for customer service. San Marco, Riverside, Ortega, Fleming Island, and Ponte Vedra homeowners trust their upholstery projects to us and love the results. Let us redo your dining room furniture in the fabric you love so you can start enjoying it!